


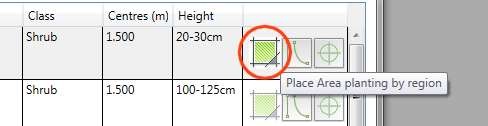
Command: The Place Area Planting command is available from the Create Planting dialog.
Purpose
Area Planting can be applied to a floor, closed region, native Revit area or split topo.
ArtisanRV projects an area boundary onto the underlying topography if this exists and the projected (real-world) area is used to calculate plant numbers.
Planting can be placed into an area as a single plant species/variety or as a mix and areas can be over or underplanted if the system detects that planting has already been applied.
Usage
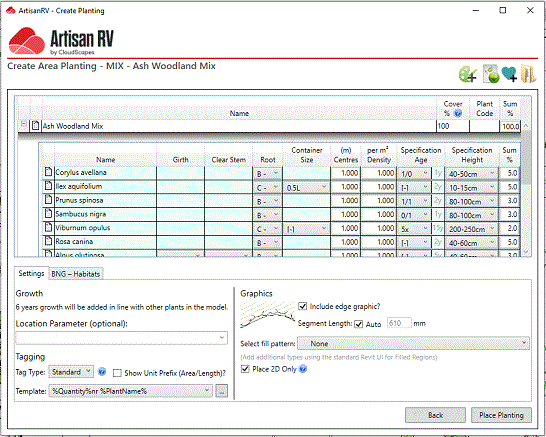
Select Place Area Planting to display the Area Planting Options dialog.
Cover Percentage
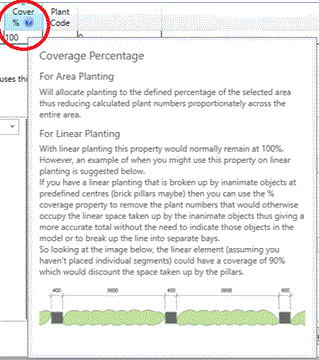
Area and Linear Planting can be applied by a Cover Percentage (Cover %) that defines the coverage of the selected area to be covered (default is 100%).
Planting Parameters
Edit Root, Container Size, Centres, Age, Height/Spread values as required. CS ArtisanRV includes a utility to convert standard planting age and condition conventions into a modelling age used for visualisation and Grow routines : the calculated model age is displayed in the greyed out in the adjoining box.

Planting Centres and Densities
Plant Spacings can
be specified by either Centres or Density and entering a value in either
box will automatically override the corresponding one. The calculations
between density and centres values are based on the following
formulae...
Density (Area) = 1 / (Centre Distance
Squared)
Density (Length) = 1 / (Centre
Distance)
If a user has initially defined a
'Centres' value when creating a palette or subsequently when editing a
label, the 'calculated' density value may not be a whole number if the user
decides to display this subsequently in a label or
schedule.
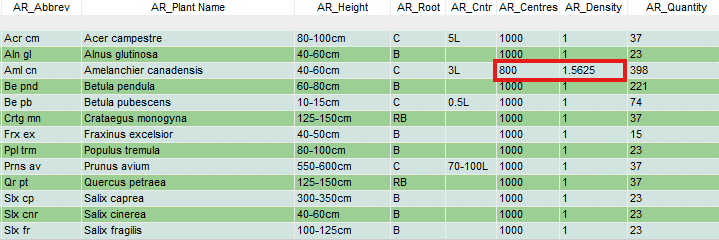
By way of example, if a 'Centres' value
of 0.800m (800mm) is defined, the corresponding 'Density' value will be 1.5625
(i.e. 1.56 plants per m2).

A schedule of the above planting with
both the Centres (AR_Centres) and Density (AR_Density) fields selected would
display the corresponding calculated value...
If users are wanting to specify a
‘whole number’ for planting density (standard practice), this can be set when
the palette is originally created and planting is placed or subsequently using
the Edit Planting tools. Set the Density as required (e.g. 2 plants per m2) and
the values are adjusted accordingly in associated
schedules.
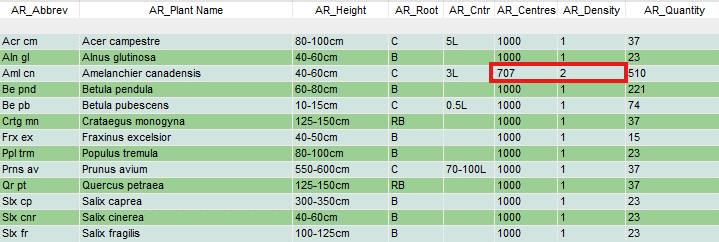
If planting is placed from a palette
where planting rates were specified as 'Centres' and then subsequently a
decision has been made to display Densities, the resultant Density value is
calculated accurately based on the specified Centres value. If values
are not as anticipated, users should use the Edit Planting or the
Plant Explorer tools to modify values as
required.
Growth
Note that Planting is Aged based on model parameters.
Location
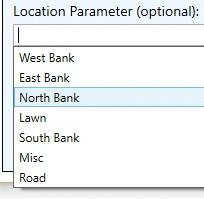
Define a Location Parameter (if required) by selecting from the pop down menu or defining a new Location by typing in the edit box. The Location pop down list is populated automatically whenever ArtisanRV objects are placed in a model.
CS ArtisanRV will attempt to place planting on an available topography for visualiation purposes and to record accurate values by draping area boundaries onto the model surface.
It is common practice to apply hatch patterns to projected areas when viewed in Plan view.

Options are available to apply an Edge Graphic and Fill Pattern to the Area planting when viewed in Plan view. Select 'Include edge graphic' to create a wavy vegetation edge within the selected area boundary. By default, the Segment Length is set to 'Auto' but users are able to specify a different value by deselecting the 'Auto' toggle and entering a value in the edit box.
Select a fill pattern as required from the pop-down menu.

Note that users are able to assign a hatch or colour fill pattern to the area planting by selecting from the pop down menu.
The 'Place 2D Only?' option enables area planting to be created more efficiently when a plan view representation is sufficient. Selecting this option does not create 3D components so associated area planting will not be visibile in 3D views.
Users are able to switch area planting to display 3D content subsequntly using Edit Area Planting or the Add 3D Planting to Areas commands.
Tagging
Tagging options are available from the Tag Type pop down menu and users are able to add a Unit Prefix for planting applied to an Area/Length (not available when selecting the Type Mark Tag option).

A Standard Tag is based on the Template selected from the drop down list and users are able to create their own templates using the browse (...) control. Templates are created using a combination of selectable parameters [enclosed in parentheses (%)] and free text. A Standard Tag using the Template %Quantity%nr %Abb% is displayed below.

A Compact Tag displays the Plant Code (type parameter) with an instance count suffix (e.g. -2, if it is the second time the plant or mix has been placed in the model).
This option assumes a PlantCode has been assigned for the associated plant or mix: only an instance count is displayed if a PlantCode has not been assigned to the selected plant species/variety (type).

Users are able to retrospectively assign PlantCodes using the Edit Planting tools or the more spohisticated Plant Browser tool that enables modifications of both planting Type and Instance parameters.
A Type Mark displays the Plant Code without an instance count and is enclosed within a circle.
This option assumes a PlantCode has been assigned for the associated plant or mix.
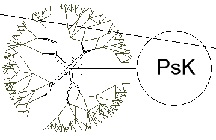
Users are able to retrospectively assign PlantCodes using the Edit Planting tools or the more spohisticated Plant Browser tool that enables modifications of both planting Type and Instance parameters .
Place Planting
Select an area to place planting. CS ArtisanRV enables users to place area planting by...
The example below shows planting being placed on a split topo.
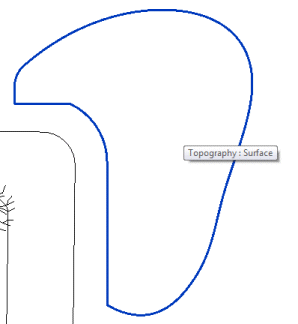
The boundaries of planted areas are displayed with an illustrative vegetation graphic. Individual planting numbers are calculated based on the defined centres value and the selected area (real-world area projected onto topography) and a Tag is placed in the view.

The calculated number of plants is based on the Surface Area projected onto the underlying topography, floor or region. The example below shows a planting mix placed on a TopoSolid Sub-division.
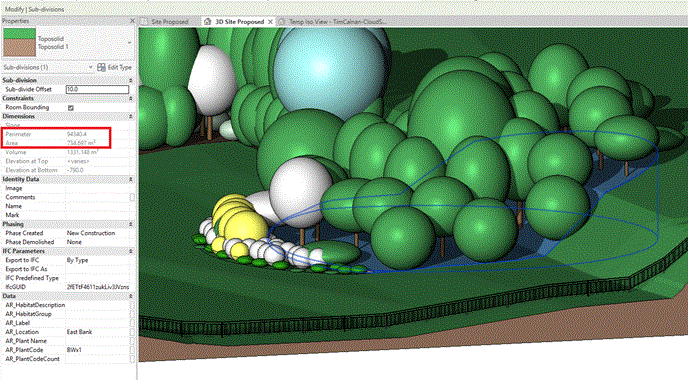
Note that the above image shows the Planting Area grown by 20 Years based on the averaged ultimate height/spread and years to maturity of the components of the mix applied to the area.
If an area is detected as already containing planting content, users are prompted to create Overlay or Underlay planting .
Planting specification information can be changed using the Edit Planting tools or the more spohisticated Plant Browser tool that enables modifications of both planting Type and Instance parameters.