Purpose
Alter labels that have already been placed. Note that the Edit Label tool enables users to change any Artisan Label including planting and non-planting labels...
Usage
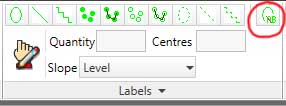
1. Click the Edit Selected Labels button
|
|
Click the Edit Selected Labels button on the Label Ribbon Panel. If labels are already selected then move to Step 3. |
2. Select Labels
 |
Click on each label that is to be edited or use the CAD system's window selection tools to select them. When they are all selected press Enter |
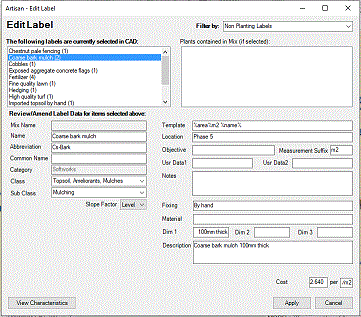
3. Edit Label Dialog (properties displayed differ depending on label(s) selected)
|
|
|
|
|
|
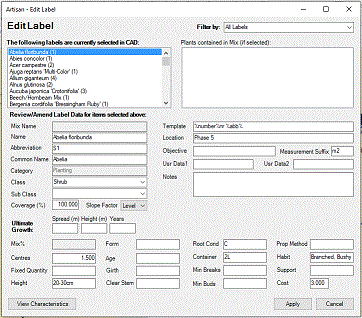
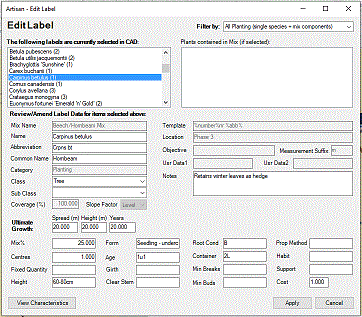
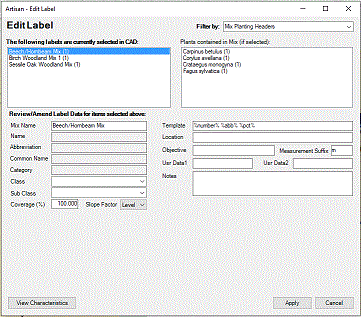
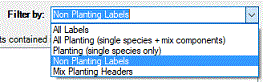
Select Non Planting Labels from the Filter by menu...
The top list box in the dialog lists each different item that has been selected. The number of labels for that item is quantified in brackets after the items name. Note that it is the number of labels indicated not the calculation of the items.
4. Select Label(s) to alter
The selected labels list displays only Non Planting Labels...

Change details as required for associated specification information or user data and notes. Note that users are able to select multiple records for editing.
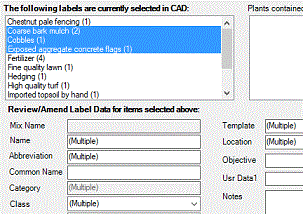
If different values have been assigned to fields when more than one label is selected, the entry "(Multiple)" is displayed accordingly.
Note that applying changes to fields when multiple selections have been made, will result in ALL SELECTED labels being edited accordingly.
The Labels area is divided into 'Header' and 'Details' and users are able to define what information is displayed in either section and whether or not each is displayed (shown).
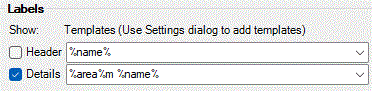
Header and Details are defined from a combination of 'expressions' and 'free text'. A pop-down list offers pre-defined options for Header and Detail items and users are able to manually edit Label Templates using defined expressions as required.
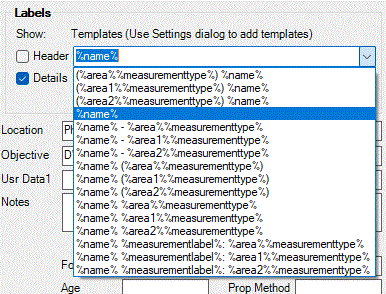

Label Headers are stacked above Item Details and can be applied for both single species planting labels or for planting mixes (comprising a mix name and associated planting components, specifications and percentages).
5. Edit the fields
Change the field values to the ones required and then click the Apply button to save the changes.
Pick Apply to commit changes to the selected label(s).
Notes
Some fields directly effect the appearance of the label...
Label Template - Change the fields displayed in the label's text via Header and Details. For a full list of macros that can be used in a template see the Label Template Reference page.
Links