Purpose
Insert a selected item into the palette
Usage
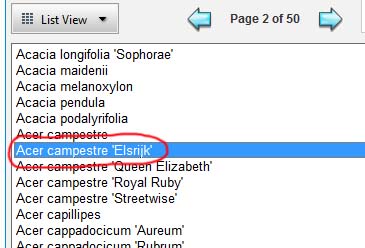
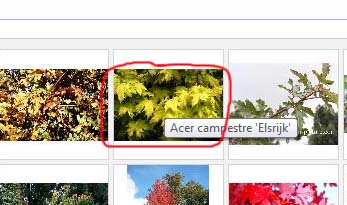
1. Select an item
|
|
Select an item by either clicking on its name in the list view or clicking on its image in the gallery view. |
2. Characteristic Dialog
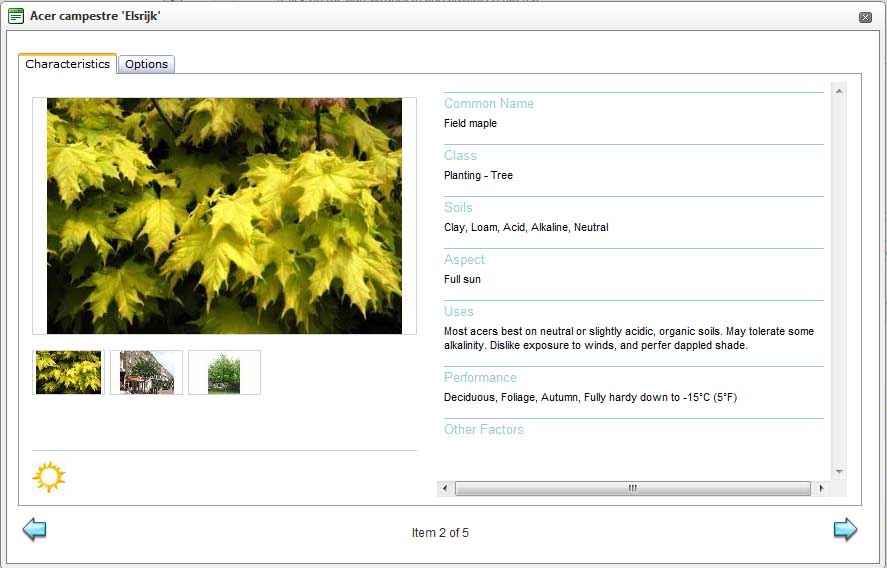 |
The Characteristics dialog for this item displays. In the characteristics tab the images are displayed on the left and characteristic details are displayed on the right |
3. Item Images
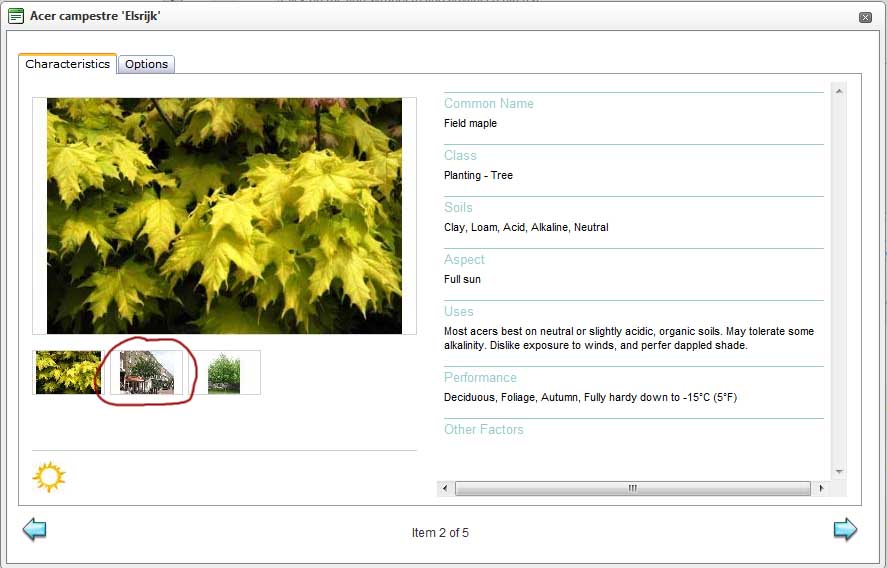 |
Click one of the small images to display it in the larger image area. |
4. Item Icons
 |
Any characteristic icons relevant to this item appear at the bottom left of the dialog just above the navigation panel. For full information about the icons see the Characteristic Icon Reference page. |
5. Navigation
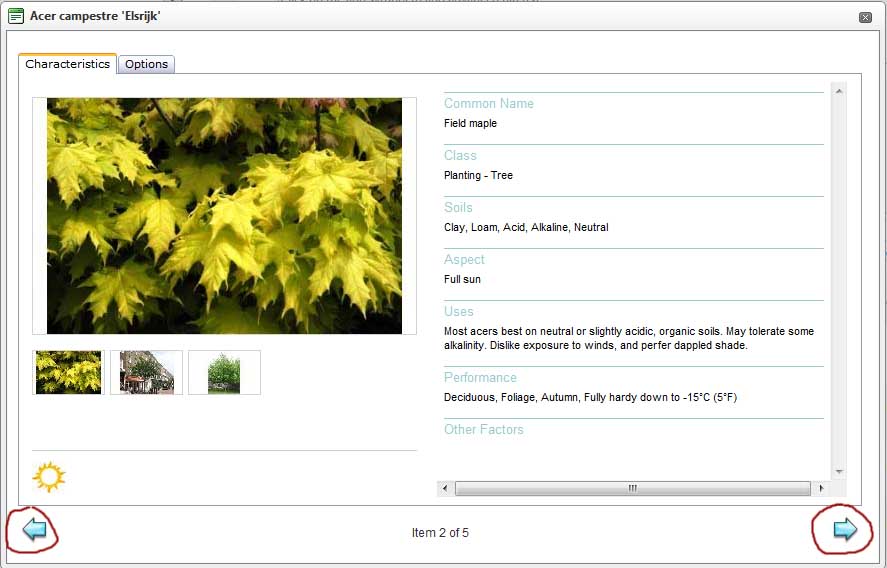 |
Use the back and forward navigation buttons to navigate through all the items in the current filter selection without closing the dialog and returning to the Palette Builder page. |
6. Options Tab
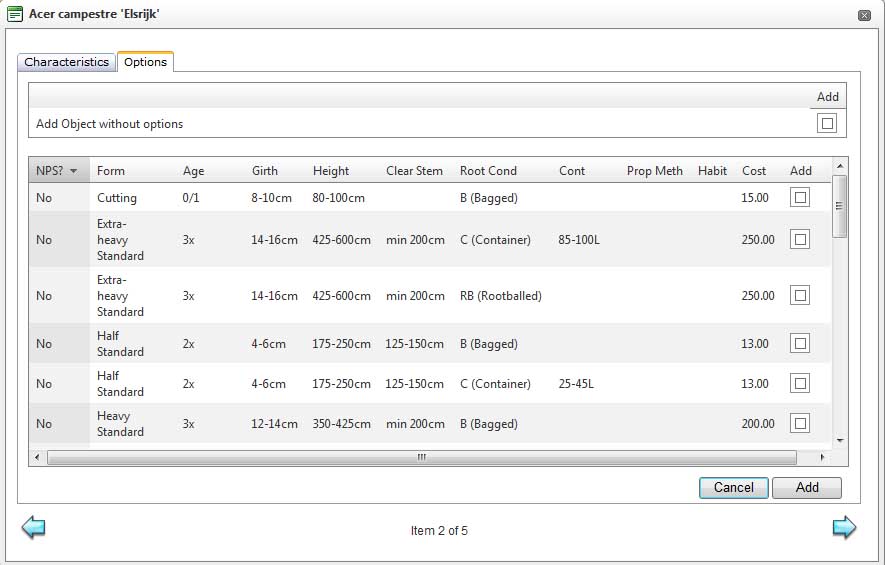 |
Click on the Options tab to see a list of item options held in the database. |
7. Selecting Options
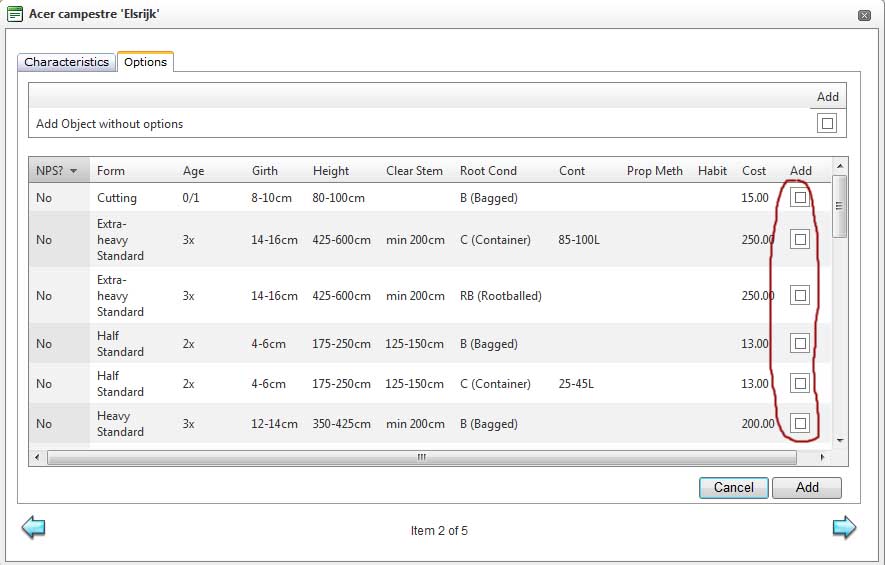 |
Tick one or more of the predefined options to select them for adding to the palette. |
8. Selecting Item without Options
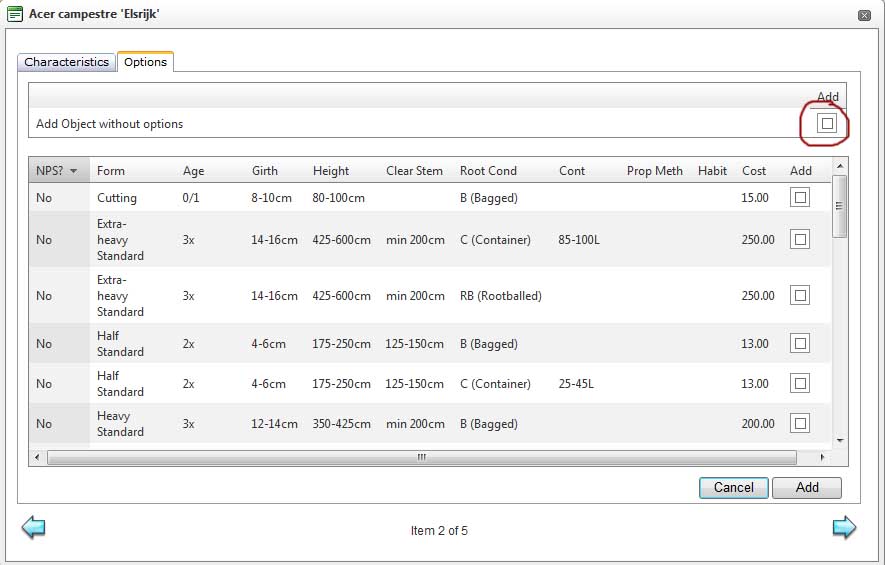 |
Tick the Add Object without options box so the item can be added to the palette without predefined option data. This is needed if the item does not have predefined options or if the user wishes to edit the item manually in the palette later. |
9. Add Selections to Palette
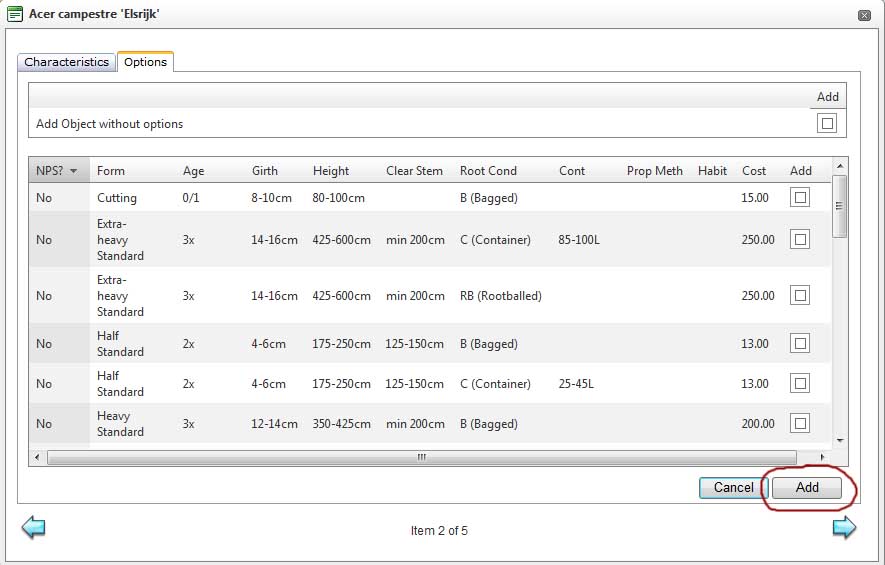 |
After at least one option (or the add without options box) has been ticked click the Add button to add the selections to the palette. |
10. Edit Options before Insertion
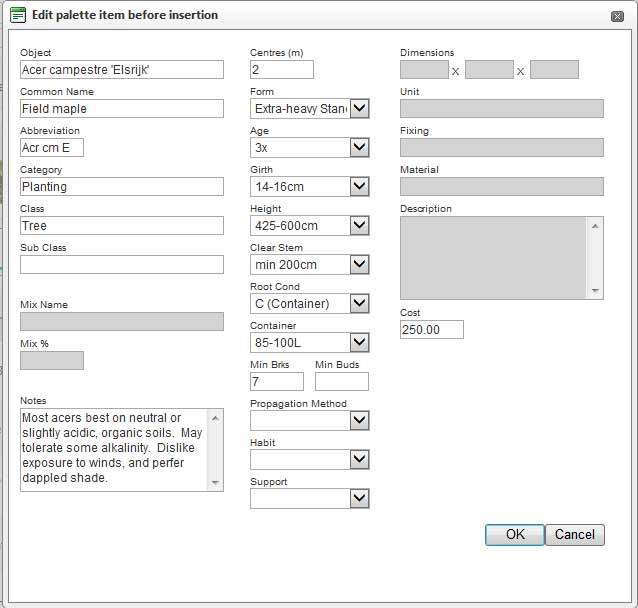 |
If only a single option is inserted into the palette (several can be inserted at once if required). The Edit Options dialog will then display so that the option can be edited, if required, before it is inserted into the palette. |
11. Palette Refreshed
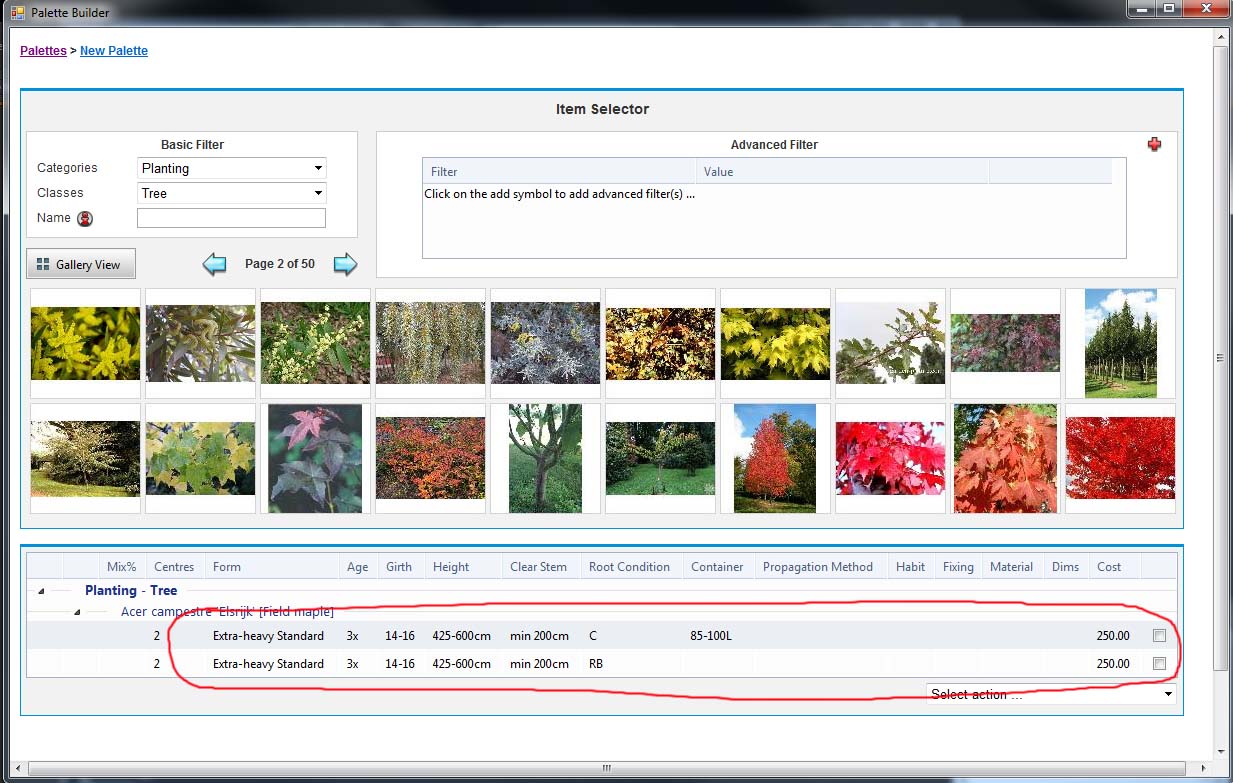 |
The characteristics dialog closes and the palette is refreshed with the new options displayed. |