


Command: CSA_LABEL_AREA
Purpose
Insert label based on existing closed entities in the CAD system.
Usage
1. Click the Insert Label by Area button
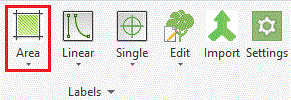 |
Click the Insert Label by Area button on the Label Ribbon Panel. |
|
|
2. Select Closed entities to add
 |
Click on one or more closed entities to add to the selection area. |
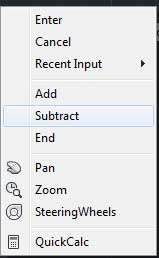
3. Change to subtractions
|
If subtractions from the area are needed (i.e. holes in the area) then use the context menu to change to subtraction mode. |
4. Select Closed entities to subtract
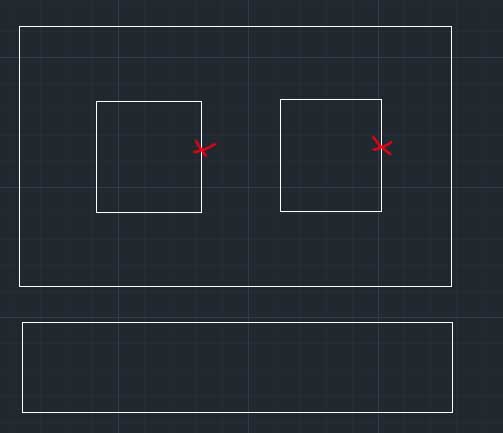 |
Click on one or more closed entities to subtract from the selection area. Use the context menu Add and Subtract commands to toggle between addition and subtraction of areas as many times as are needed. |
5. List number of entities selected
 |
The number of current additions and subtractions are displayed in the editor at the bottom of the CAD window. |
6. End Selection
 |
When correct areas are selected use End from the context menu to end selection and place the label. |
7. Click point of arrowhead
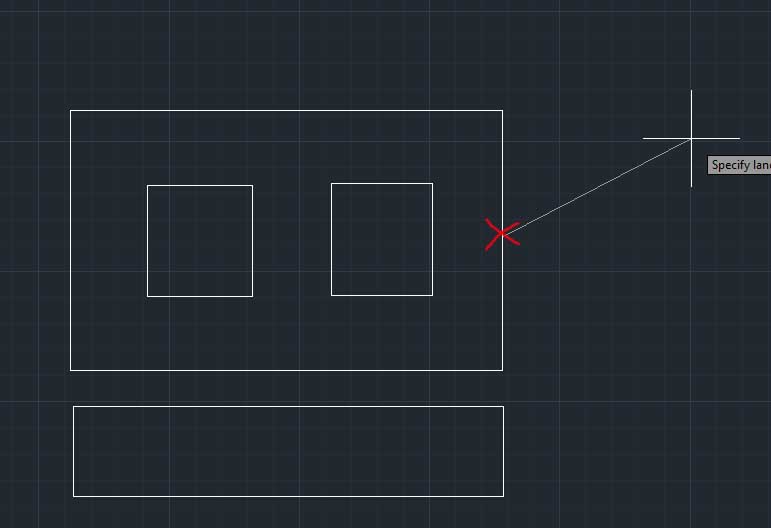 |
Click on the point where the arrowhead is to be drawn. |
8. Click end of leader
 |
Then click on the point where the label is to be drawn. The item label and any quantity calculation will be displayed. |
Notes
The label Area command calculates the items within a given area according to the formula:
Number = (Area x Slope Factor) / Item Centres Squared
The number and the centres can be overriden using the Label Insertion Options.
The style of the leader and the label text is determind by the current Label Preferences.
For further information on centres and densities see the Density Reference page.
Links
